Tuesday, 23 April 2013

Recycled Art

I have found this fantastic website called 'Hongkiat.com' and it's post on recycled art is great.

Click here to visit!

indian on horse

Sunday, 17 March 2013

Final Major Project!

I have chosen my FMP's theme to be 'Make do and Mend'. I am so excited for it and have been able to include the crafty recycling that I try and do at home. One thing I have created that I am so proud of is this cushion...


I am so proud of it as it is my first ever patch work pillow and it went quite well. It's made completely out of recycled materials. The blue and light purple patches are left overs from the fashion students at my college and the dark purple is part of my partners old t-shirt. The material on the back was an old throw over donated to us by our grandmother and the stuffing had been nicked from an old pillow that had gone lumpy. So in essence, this pillow was free to make! It used materials that would otherwise have been thrown away.


This is what my work space looked like and I loved it! I feel so happy creating things and developing traditional skills that are useful but also nice as a hobby or something. That is why I chose this theme for my final major project.

Friday, 1 March 2013

Blog I found on FlipBook app.

This guy is called Lex Wilson and has filled an entire Moleskine sketchbook with incredible doodles. They are so nice, this blog shows some of them.

Click here to see his page.


Moleskine Illustrations by Lex Wilson
These intricate illustrations are created by London based graphic designer and illustrator Lex Wilson. He’s filled an entire Moleskine notebook with these incredible little doodles and you can check out the entire series on his behance and flickr which are linked below. I strongly suggest checking them out because I only selected a few and there’s many many more.

Artists: | Flickr | Behance | Facebook | Twitter | [via: Whudat]

Friday, 11 January 2013

Birthday Kiss


This is a digital drawing I did in Photoshop over a picture taken of me and my fiance on my 18th birthday. I used a graphics tablet and a default, round brush to trace over the lines of the image. It's basically just a trace of a photograph, but I really like the effect it has.
On each area of hair, I tried a slightly different approach. My hair (right) I did with a thicker brush and outlines each section of shape in my hair first, then went back in with two smaller brushes to add lines. For Dan's hair I used the smallest brush I used in my hair and went around the shapes like i did in mine, but much finer (and took a lot longer!). Finally, his beard was done in the same way as his hair but I didn't outline the sections first. This gave it a much lighter and finer look as it is in life.
I am so pleased with this.
I have always loved the photograph because it seemed to capture our happiness together as we tried not to laugh while kissing for the camera.
(Thought I would put some personal work on here too.)

Tuesday, 18 December 2012

Creature Project - Artist Research

Here are some artists I found that relate to the Creature Project.


Marta Altes
I love how she has used pencil sharpenings and simple lines to create characters. It's very clever, I would never have thought of that.


 Shaun Tan
I love the shading that Shaun has used for this little creature. It's cute that he has given it suitcases made out of nutshells, this also gives us a recognisable scale to think about it so we know the creature is really small.


Mattias Adolfsson
These look like they were ink splodges like what we did and he has made characters from them. They are all very odd and I wonder if he would have ever thought them up if it weren't for the ink... Or is it ink? Maybe he made the characters and then shaded them in ink. Either way, they are very interesting and unusual.

Tuesday, 27 November 2012

Amazing Artist

I was searching google images for illustrator art and came across this page. It's pretty cool, you should check it out.
Here's one of her many drawings.

Monday, 26 November 2012

Colour and Shape

This time we have a week long project. As you can tell by the title, it's called 'Colour and Shape'. The basic idea of it is that you have to pick one of four themes; Natural forms, Man made forms, Architecture and Human forms. I chose human forms as they are hard but also interesting. Most people are 'programmed' to recognise faces in many different places. So, if you do it well enough, you could draw a face using very simple lines, which is a skill that, as an illustrator, would be a valuable skill to have.

At the beginning of these pages from my sketchbook, I wasn't doing incredibly well. We had to draw the outline of a figure or part of a person, without any interior detail... like a silhouette.
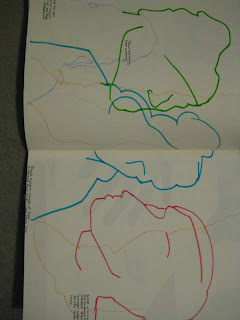

In these drawings, we were allowed to add three more lines to hint at features. I am pleased with the blue one but the green and pink are very inaccurate.

sorry about the pictures again!!

 We then drew pictures in the same way on the back of a large sheet of paper that we had inked on and use two colours of oil pastel to cover the rest.
 Then we used scissors and cut out the outline on poster paper without initially drawing it out first. (I enjoyed this part the most!)


Then we had a colour theory session where we chose sections from a magazine and tried to recreate in with paint. As you can see from this lop-sided picture, I got pretty close with the blue and red but the green wouldn't get anywhere near. I think this is because we didn't have cyan blue.
We also did the same thing using the computer, which was faster, easier and more accurate!
 

Sunday, 25 November 2012

A is for A4

In this short project, we had to choose a word beginning with 'A' and create a spider diagram of what that word meant to us and what we thought of when we heard that word.
After doing our group spider diagram, I chose the word 'Africa' as it was the word that I was most inspired by. I did much research in the college library and looked through travel guides for South Africa... I soon realised that it was going to be really hard to do observational drawings of the landscape and wildlife of Africa without going there and we only had the weekend to complete this project.
Here are the photographs of me creating the final piece after doing as much as I could with the research I had collected from the library.

I have included some of my research pages and how I have layed them out.
I appologise in advance that you will have to tilt your head to view the first few photographs because something has glitched in Blogger and it likes to alter my images without my say so and not let me change them back...


 I was pleased with how this lion cut-out turned out, though I would have liked to have made a more intricate design. I did try a more intricate one but it just kept ripping. Maybe one day within this course I will try this again and buy a new blade for my scalpel as it hasn't had a blade change since I got it... two years ago...
That could have been the reason.

Tuesday, 20 November 2012

Drawing with Wire

Exactly what it says in the title! We cut ourselves a length of wire and bent it with our hands so it looked like a 2D, continuous line drawing of the people we had sat at our tables. If there was a part that we wanted to stick together for either structural support or to attach more wire when we ran out, we used an electric spot-welder with two copper parts that connected when you pushed the handle down.


Portraits 2

Here are some that we did where we couldn't take the charcoal or graphite stick off the page and we couldn't look at the page, but stay looking at the person we were drawing so we could teach ourselves to really look at what we were drawing.
We then moved 1 place clockwise and drew the next person in front of us the same way. This made us overlap our drawings, making an interesting strip of drawings we created as a whole group.


Monday, 19 November 2012

Portraits 1

Here we created portraits of the new class mates we met using objects supplied to us by our tutor. Both of the girls on my table had dramatic side fringes, which I tried to show in some of my portraits.